Introduction
Taqtile uses Docker containers to allow clients flexibility to install on premises or in their own hosting environments. This document explains how to install and configure Manifest Server using Docker.
What is Docker? Docker is a containerization platform that packages application and all its dependencies together in the form of a docker container to ensure that application works seamlessly in any environment.
What is a Container? A Docker Container is a standardized unit which can be created on the fly to deploy a particular application or environment.
Using docker you can install a local server copy of Manifest. It is a very useful tool especially when you don’t have access to the Internet but need to demonstrate Manifest

Prerequisites
Docker set up and installation will require the following information that can be obtained from your Account Manager.
- Docker login password which can be obtained by your Account Manager
- Current docker-compose.yml file (attached below)
- License key loaded with the # of licenses agreed within the Taqtile, Inc. contract. This key can be obtained by your Account Manager and will manage the agreed upon # of licenses.
Setting Up Docker
- Download Docker (without registration) or from web (with registration on your computer).
- Install Docker on your computer.
- Click on “Docker for Windows” shortcut and then check that it works in the tray bar:

- Create a folder “manifest” in local disk C on your computer. Download the docker-compose2.4.txt file and rename the file to docker-compose.yml. Once the file is renamed place this file into your “manifest” folder.
IMPORTANT: Once downloaded be sure to append the file extension to .yml versus .txt
5. Create a folder in “manifest” called “uploads”

- Set up environment variables in docker-compose.yml file
API VARIABLES:
- VOLUMES: Update </put/path/to/file/storage/here>:/uploads
- Example: Example: /c/manifest/uploads:/uploads
- IP_ACCESS: “<PUT_VM_IP_ADDRESS>” – Based on this variable manifest will create stun/turn configuration with our stun/turn container from compose.
- ADMIN_EMAIL: “<PUT_ADMIN_EMAIL>” – With this variables manifest will generate admin account.
- ADMIN_PASSWORD: “<PUT_ADMIN_PASSWORD>” – With this variable manifest will generate the login for the admin
- LICENSE_KEY: ” ” – Obtain license key from your Manifest Account Manager
WEB VARIABLES:
- VOLUMES: </put/path/to/file/storage/here>:/usr/share/nginx/html/uploads
- SELF-ASSIGNED CERTIFICATES: <put_here_path_to_folder_where_certs_will_store>:/usr/share/nginx/certs
- EXAMPLE: /c/manifest/uploads:/usr/share/nginx/certs
- If clients want to use their own certs they can replace certs in this folder and restart the web container and new certs will automatically be applied.
- IMPT! Certs must be named “nginx-cert.crt” and “nginx-cert.key” in order to work. Without these file names, Manifest will create self assigned certs and will use those instead.
- IP_ACCESS=”<PUT_VM_IP_ADDRESS>” – Based on this variable manifest will create self-signed ssl certificate.
CONVERTER VARIABLES:
- VOLUMES: </put/path/to/file/storage/here>:/manifest-cs/folder
- EXAMPLE: /c/manifest/uploads:/manifest-cs/folder
Example of a docker-compose.yml

7. Save the file with name docker-compose.yml and type “All Files.” Change Encoding to UTF-8

Once the docker-compose.yml is saved you should see a file with YML format:

- Run cmd as Administrator
- Right click mouse button on the start menu and choose “Task Manager”

- Click on File–> Run new task, write “CMD” and check the box to run as Administrator and press [OK]:

- Copy the below command in CMD
docker login taqtile.azurecr.io -u taqtile -p [please inquire for password]
and then press [Enter]. You should get “Login Succeeded”:

10. Change current directory to c:/manifest by typing cd c:/manifest

11. Copy command docker-compose up -d in CMD and the process will started. It may take some time, so please be patient. As a result you will see “…done” as seen in the below screenshot:

12. Check your docker results with the command docker image ls in CMD. This will show the all the docker containers.

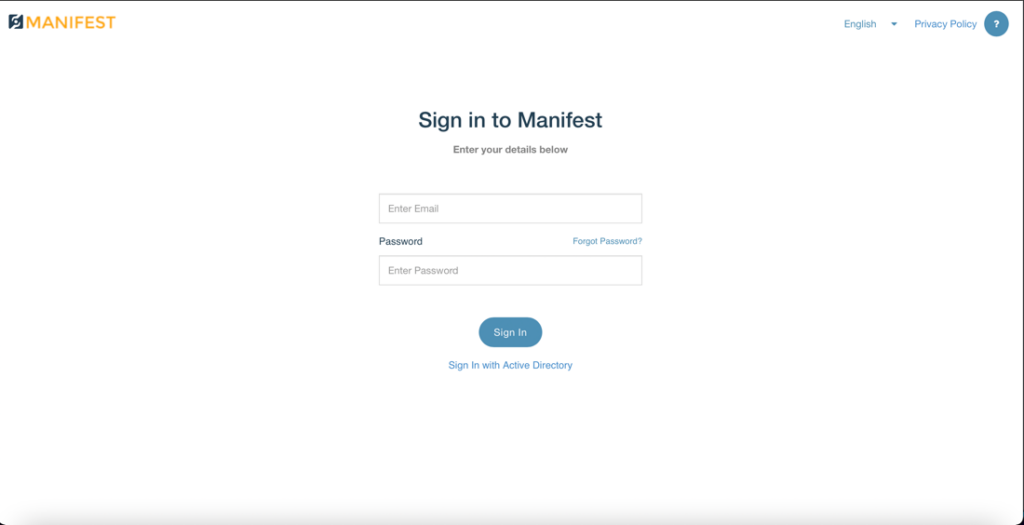
13. Open your Chrome Browser and type localhost in your browser. You will be directed to the Manifest login page. Enter in the following credentials to log into the Manifest Client Application.
Email: <Email from docker-compose file>
Password: <Password from docker-compose file>

14. To access docker on the HL2 device, in the Command Prompt, type ipconfig to obtain your IPv4 address. On devices Login page enter in the IPv4 address into the domain field and enter in your Email and Password credentials.

15. Congratulations! You’ve created a new client and can start working with it.
Updating Your Docker Instance
The instructions below show how to update the docker container when an existing docker is already installed. Updating your docker instance will not clear the existing content already added to the docker. It will simply update it to the latest version.
IMPT! If updating your docker instance from 2.4 or earlier – please follow the instructions to migrate to a new database image. Those instructions are can we found HERE.
- Make sure your docker is running and all the containers have been started.


2. Update your c:\manifest folder with the updated docker-compose.yml file. Make sure all the variables have been updated in the docker-compose.yml file
API VARIABLES:
- VOLUMES: Update </put/path/to/file/storage/here>:/uploads Example: Example: /c/manifest/uploads:/uploads
- IP_ACCESS: “<PUT_VM_IP_ADDRESS>” – Based on this variable manifest will create stun/turn configuration with our stun/turn container from compose.
- ADMIN_EMAIL: “<PUT_ADMIN_EMAIL>” – With this variables manifest will generate admin account.
- ADMIN_PASSWORD: “<PUT_ADMIN_PASSWORD>” – With this variable manifest will generate the login for the admin
- LICENSE_KEY: ” ” – Obtain license key from your Manifest Account Manager
WEB VARIABLES:
- VOLUMES: </put/path/to/file/storage/here>:/usr/share/nginx/html/uploads
- SELF-ASSIGNED CERTIFICATES: <put_here_path_to_folder_where_certs_will_store>:/usr/share/nginx/certs
- EXAMPLE: /c/manifest/uploads:/usr/share/nginx/certs
- If clients want to use their own certs they can replace certs in this folder and restart the web container and new certs will automatically be applied.
- IMPT! Certs must be named “nginx-cert.crt” and “nginx-cert.key” in order to work. Without these file names, Manifest will create self assigned certs and will use those instead.
- IP_ACCESS=”<PUT_VM_IP_ADDRESS>” – Based on this variable manifest will create self-signed ssl certificate.
CONVERTER VARIABLES:
- VOLUMES: </put/path/to/file/storage/here>:/manifest-cs/folder
- EXAMPLE: /c/manifest/uploads:/manifest-cs/folder
3. Run CMD as Administrator
- Click on File –> Run new task, write “CMD” and check the box to run as Administrator and press [OK]
- Change the current directory to c:\manifest by typing cd c:\manifest

4. Run the following commands in this order:
- docker-compose down
- docker-compose pull
- docker-compose up -d

5. Check your docker results with the command docker image ls in CMD. This will show all the docker containers.

6. Open your Chrome Browser and type localhost in your browser. You will be directed to the Manifest login page. Enter in the following credentials to log into the Manifest Client Application.
Email: <Email from docker-compose file>
Password: <Password from docker-compose file>

7. To access docker on the HL2 device, in the Command Prompt, type ipconfig to obtain your IPv4 address. On devices Login page enter in the IPv4 address into the domain field and enter in your Email and Password credentials.

8. Congratulations! You’ve updated your docker to the latest version. When logging in you should still see all the content that was previously created from past versions.
Clearing Docker and Reinstalling
The instructions below show how to clear all images from a past docker version install and start from scratch.
- Make sure the docker is running.

2. Update your c:\manifest folder with the updated docker-compose.yml file. Make sure all the variables have been updated in the docker-compose.yml file
API VARIABLES:
- VOLUMES: Update </put/path/to/file/storage/here>:/uploads Example: Example: /c/manifest/uploads:/uploads
- IP_ACCESS: “<PUT_VM_IP_ADDRESS>” – Based on this variable manifest will create stun/turn configuration with our stun/turn container from compose.
- ADMIN_EMAIL: “<PUT_ADMIN_EMAIL>” – With this variables manifest will generate admin account.
- ADMIN_PASSWORD: “<PUT_ADMIN_PASSWORD>” – With this variable manifest will generate the login for the admin
- LICENSE_KEY: ” ” – Obtain license key from your Manifest Account Manager
- IMPT! If you have an new license key that was provided after the original install you must do a pull command in order to pull in the new license key variable. The commands are:
- docker-compose down
- docker-compose pull
- docker-compose up -d
- IMPT! If you have an new license key that was provided after the original install you must do a pull command in order to pull in the new license key variable. The commands are:
WEB VARIABLES:
- VOLUMES: </put/path/to/file/storage/here>:/usr/share/nginx/html/uploads
- SELF-ASSIGNED CERTIFICATES: <put_here_path_to_folder_where_certs_will_store>:/usr/share/nginx/certs
- EXAMPLE: /c/manifest/uploads:/usr/share/nginx/certs
- If clients want to use their own certs they can replace certs in this folder and restart the web container and new certs will automatically be applied.
- IMPT! Certs must be named “nginx-cert.crt” and “nginx-cert.key” in order to work. Without these file names, Manifest will create self assigned certs and will use those instead.
- IP_ACCESS=”<PUT_VM_IP_ADDRESS>” – Based on this variable manifest will create self-signed ssl certificate.
CONVERTER VARIABLES:
- VOLUMES: </put/path/to/file/storage/here>:/manifest-cs/folder
- EXAMPLE: /c/manifest/uploads:/manifest-cs/folder
3. Run cmd as Administrator
- Click on File –> Run new task, write “CMD” and check the box to run as Administrator and press [OK]
- Change the current directory to c:\manifest by typing cd c:\manifest

4. Enter in the following commands:
- docker-compose down
- docker image prune –all
- docker system prune –volumes
5. To check if the docker has been cleared type: docker image ls. If the docker was cleared the commands results will be empty and all cleared.

6. To check if the docker volumes have been cleared type: docker volume ls

7. Once that is completed running, to reinstall docker, please enter:
- docker-compose up -d
8. Check your docker results with the command docker image ls in CMD. This will show the all the docker containers.

9. Open your Chrome Browser and type localhost in your browser. You will be directed to the Manifest login page. Enter in the following credentials to log into the Manifest Client Application.
Email: <Email from docker-compose file>
Password: <Password from docker-compose file>

10. To access docker on the HL2 device, in the Command Prompt, type ipconfig to obtain your IPv4 address. On devices Login page enter in the IPv4 address into the domain field and enter in your Email and Password credentials.

11. Congratulations! You’ve updated you docker to the latest version. When logging in you should still see all the content that was previously created from past versions.
Tips From The Experts
Can’t find your IPv4 address to log into the device? In the command prompt, type ipconfig and/or u URL https://www.makeuseof.com/tag/find-ip-address-windows-10/
What if I get a new licenses key for the on-prem deploy? What do I need to do?
If you receive an updated license key you need to make sure you “pull” in the new license key. Please follow these commands:
- docker-compose down
- docker-compose pull
- docker-compose up -d
How do I move upload files from docker volumes to host storage? With docker compose launched, the easiest way to upload files from docker volumes to host storage is by the following command:
- docker cp [API_CONTAINER ID]:/uploads [PATH/TO/NEW/STORAGE]
- docker-compose restart
How can change the SSL certificate if I want to use my own? You can replace the two files in the certificate storage folder and restart the container by use the sudo docker container restart (web_container_id) command. IMPT! Names of the SSL certificate must be nginx-cert.key and nginx-cert.crt.
Trouble logging in and getting a “Check your Credentials”? If you are having trouble logging into the 3D device and receiving the “Check your Credentials” message try to:
- Confirm you are entering in the correct IPv4 address
- Confirm that you are entering the correct Email and Password that you set in your docker-compose.yml file.
Getting an ERR_CONNECTION_TIMED_OUT message when logging in with your IP address? You might need to make sure that Port 80 is opened up on your PC for the docker to run properly. To confirm your Port 80 is open, please follow these steps:
For Windows

- Select TCP
- Make sure all these Rules are checked: Domain, Private + Public

For Mac:
- Open System Preferences –> Security + Privacy –> Privacy –> Firewall –> Firewall Options
- Check Add
- Choose an application from the Applications folder and click Add
- Ensure that the option next to the application is set to Allow incoming connections
- Click OK
Did you receive this error when trying to run docker? If an error as show below appears when running docker it’s likely due to having the wrong docker settings on Windows. When using the Manifest compose file you need to use Linux containers versus Windows containers. For more information please visit here: https://docs.docker.com/desktop/windows/#switch-between-windows-and-linux-containers